
FUN-LEARNING AIDS
LEARNING AIDS FIXED ONTO THE WALL
Our purpose is to think of and create interactive learning methods (or study games) that will be fixed onto the walls for the children at the village to play with and also to gain knowledge at the same time. It is so that they feel interested in studying and also have fun at the same time, so that they are willing to study further and make themselves educated.
MATHS AIDS
(3 HOURS)
RESEARCH FOR THE AIDS


.jpg)

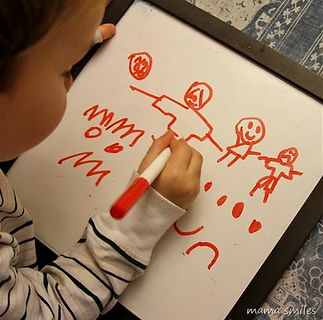
The idea is to create a game that is easy to play and the children will not get confused because the age group is 4-10. It is indeed a wide range of children who will have different level of understanding for a game.
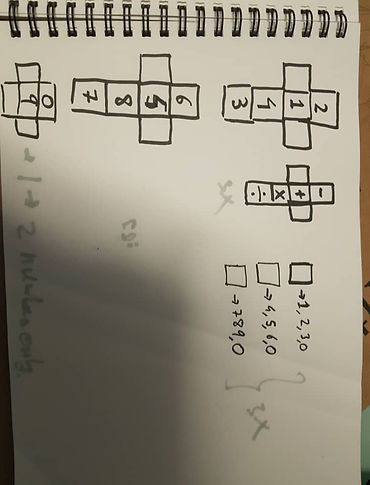
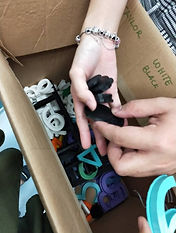
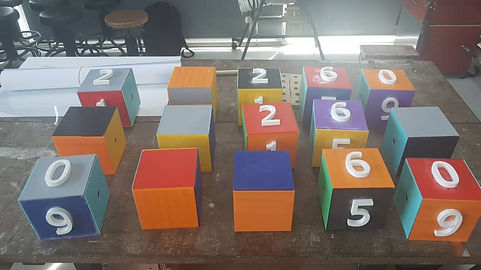
Hence comes the idea of use the most basic abacus cubes, but instead of the ABCs on them, the numbers will be on them.
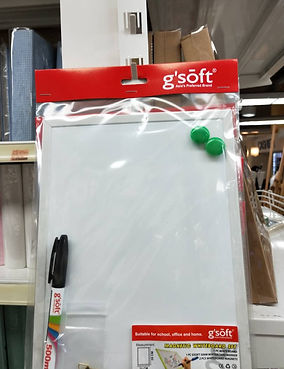
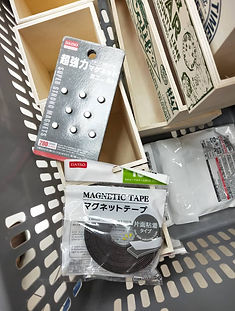
For the answer part I really wanted to do Numerical magnets. But magnets are dangerous and the younger kids might even swallow them. And they will be lose items so it will be easy to lose as well. Hence we had to scrape that idea and go with the simplest fixed item, the white board. Chalkboard are good too but the dust particles may irritate some people, and if the boards are not cleaned properly, it can get messy very easily. Hence whiteboard is the way to go.

PROPOSAL/PRESENTATION (1 HOURS)

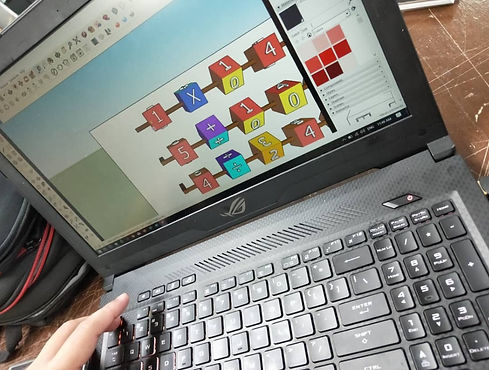
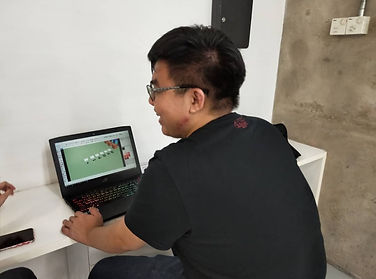
The result of our planning was this. We sketched out our ideas and used Sketchup to create a 3D prototype of our design.
THE MATERIAL HUNT/BUDGETING (3 HOURS)
All the materials listed below were from Art Friend, as well can find all sorts of quality things there. Also everything can be found in one place which is obviously a plus point and saves time.


-
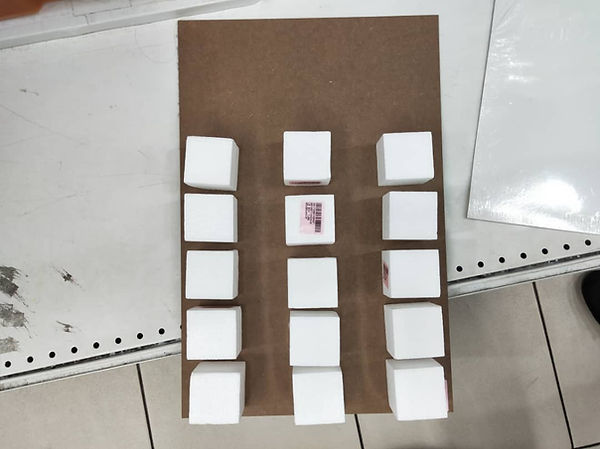
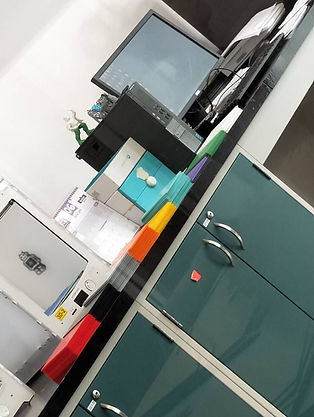
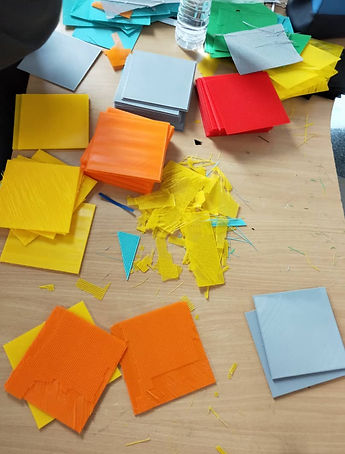
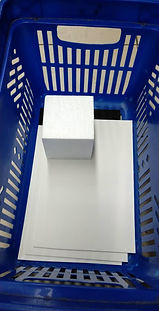
The items shown above are the things that we will most probably use in this little project. The cubes are arranged on an A3 size MDF board.
-
the picture beside it shows a stack of colorful papers that will be used to cover the Styrofoam cubes and make it seem more colorful and inviting to the kids.
-
The picture below it shows the different types of color that are in it.
-
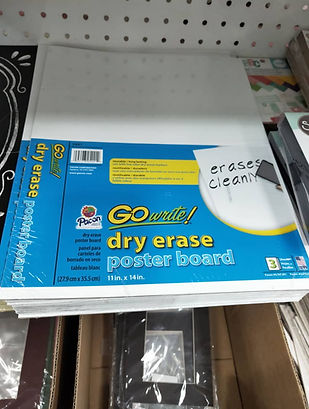
The picture in the middle shows a dry erase plaster board that is very thin and lightweight, so it can be glued to the MDF board and can be used as a white board.
-
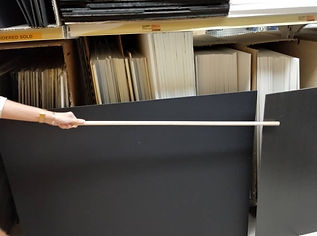
the picture on the bottom left shows wooden sticks of different diameters. these sticks will be used to hold the cubes in place so that they can move it around and also rotate it do actually do the math.
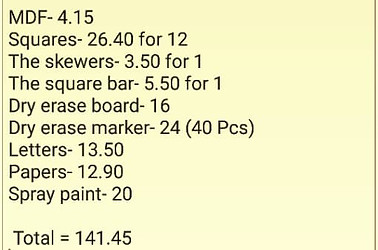
The picture show on the left is the material and cost list
These are the amount and how much the cost adds up for each that were taken from Art Friend. There maybe future changes to the list as nothing has been bought yet and we are trying to find cheaper and recyclable alternatives.
Click on the Pdf file to view the Proposal
To make the Maths part of the proposal slides, David and I did the slides part on this maths game. (1 hour)
Reflection
Group 5 (Fun learning aids)
As soon as I heard about the subject options, I jumped in and staked my place in the math department. The first idea that came to me was rubric's cube and having different numbers on each side and the children having to solve them. But then again it needs to be something fixed to the wall so that they cannot take it off and lose it somewhere.
Then came the second idea, to use cubes with on a rod and it can be spun to come up with different number combinations which looks like a math problem and needs to be solved. I had this part fixed and that I wanted to propose this cube math problem idea. In my mind it kind of resembled the Abacus that are in children's indoor playgrounds. And when I went online to search for the photos, I indeed did come across cube abacus (reference pictures given above).
Then came the other problem, how to do the answering part of the board? I first thought of using magnetic numbers with a steel base for the game. But the age group is so wide and the younger children would for sure try to eat them and it is quite dangerous, so I had to scrape out that idea. Then came the idea of using old school chalk board, but the chalks and the dust particle along with the maintenance is a hassle. So I decided to go with dry erase plaster board.
As I had designed the whole thing in my head, I either needed a proper sketch or a 3D model to get my idea across to others. That is when David helped me and did a 3D modeling in sketchup from the very rough sketch that I showed him.
Since there are 4 People in the math department and we need to come up with options, we split into half. David and I in one group, Tisya and Yi Jie in another. I did help the other group choosing some games online and how to incorporate them into one game but the rest they did it by themselves. As for my group, I came up with the idea and went material hunting alone while David did the 3D picture of the game and helped me a little with the slides. I ended up redesigning the slides by myself to match design of the other math group, otherwise the different section of the slides will not be obvious enough.
Overall I was a little nervous for my learning aid idea as it was too simple compared to others, but then again it was easy enough for the children at the village to follow. And I thought that was the main objective which is why I went ahead with it.
(2.5 HOURS)
For week 3 we had a meeting with our lecturer to go over our budget, materials, size and the resources. So the day before the meeting, I went back to Art friend alone and went over new materials and different sizes according to what we were advised during the presentation in week 2.
Material hunting
Below are some pictures and new price list shown. This took me around an hour to look around Art friend, to consider the different sizes and options and figuring out bits we did not need and could probably use from things we already own, like the crafts paper and spray paint and poster color.


After carefully going through with all the other possible options we could use, I edited the previous price list and added in the new prices and the size option with which the size would also differ. After talking about it with my group mates and showing them the options, we all decided on the new total RM 136
Meeting with the lecturer on Friday
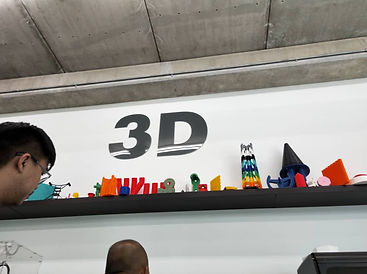
This meeting was about an hour long and here our lecturer advised us to not use the skewers for the rods that will hold the cubes. Also to not use the Styrofoam cubes as the children will easily break it. And that we should not use steel or anything metal as the elders in the village might take it away and sell it. Then she informed us that our math section should cover the whole bottom part of the wall and that the design format should be similar to that of the English aid, as it will be directly in view as soon as someone walks into the library. Then she advised us, we can use 3-D printing and laser cut that our school provides for cubes, and snake and ladder and the animal figurines. This way the cost would decrease for us and we could spend it more on making the whole aid stronger so that it lasts longer.
After the meeting was over, and with all the new information, we first contacted the English group and asked them to inform us their layout so that we could follow that. Then we went over our ideas and confirmed what else needs to be done. This group discussion was about 30 minutes.
(40 minutes)
On week 4, the English group informed us about their layout and sizing. Which is 2 A0 boards landscape and 1 A1 portrait. The Math group has a separate group chat, so in there we decided where we want to put what according to their layout. ( Which took us about 10 minutes)


Sizing the Cubes to fit the new 2 A0 sizes.
After class, on Thursday, David, Tisya, Yi Jie and I stayed back to discuss about the new sizing, how many number sets do we need and what size will they be in, and what animal figurines do we want and what colors to use, also how to hatch the snakes in the MDF board. This took about 20 minutes. Afterwards David and I used sketch up to resize the new cube size so that we can make the new cubes and give it to 3-D printing as soon as possible. The resizing took about 1 hour. Afterwards it took us around 10 minutes to determine what numbers will go on each cube and how many of those will we need to 3-D print.

I went to Art Friend that day itself to look for materials and MDF board or plywood sizes, but it was very Jam that day and by the time I reached, it was already closed. So we decided in the Group chat, that instead of doing the numbers and the animal figures in acrylic that we would have to laser cut, we could just use the 3-D printer and hence the cost would become low for us and the materials would all look in sync because it would be the same type. So we transfered the AutoCad files to sketchup and made it 3-D. All these discussions and everyone agreeing on it took around.


(2.5 HOURS)
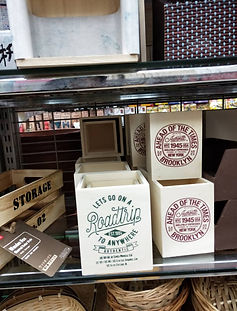
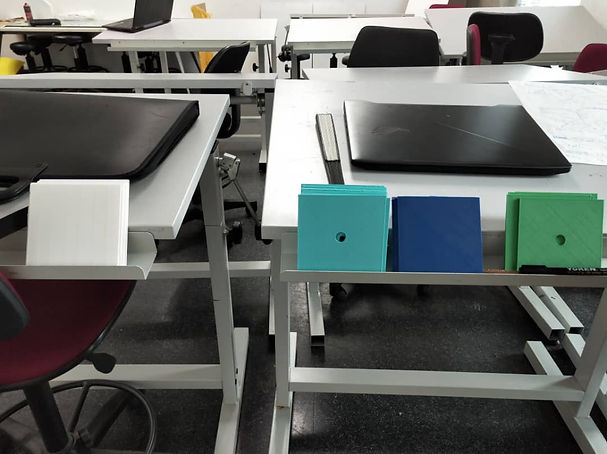
Both the math group and the English group went to the Curve mall together on a Saturday morning. We first went to Art friend, determined to buy the necessary materials to get the making of the fun aids started. And as there needs to be simmilarities in the layout of the two subjects because it will be on the same wall, so we went to buy same/similar materials. Below can be seen some pictures of out layout/materials from Art friend and Daiso. Both the groups tried out many options and selected the ones that would work for both the work, which is why we ended up taking more time.


(3 HOURS)
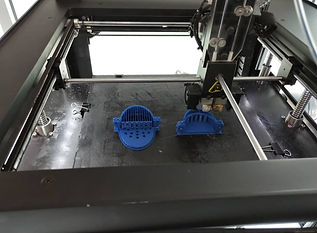
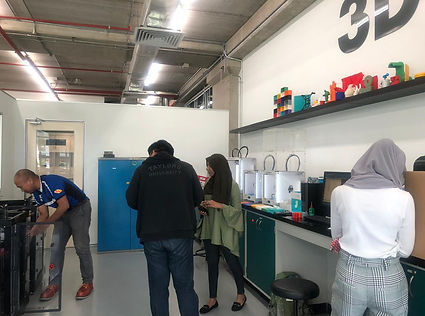
Today was the first day we gave out designs to 3D print. And we faced some problems. After talking to the Sir there, Mr Ahmed, we learned that if we want to print one whole cube at one go, it would take 15 hours, But printing one plane of the cube would take way lesser time. So we obviously went with doing separate planes for each cubes as we had around 30 cubes to 3D print and do not want to waste the school's material as well. After all that was decided, we learned the animal figurines we had designed, had some flaw and could not be 3D printed, same goes for the snakes. And we had to note down the colors for each planes of the cube and also for the numbers that were being printed, in a piece of paper for Mr Ahmed to keep track. We gave half of the things to print after editing them and the planes we could not finish editing so we decided to come back another day.


(20 minutes)
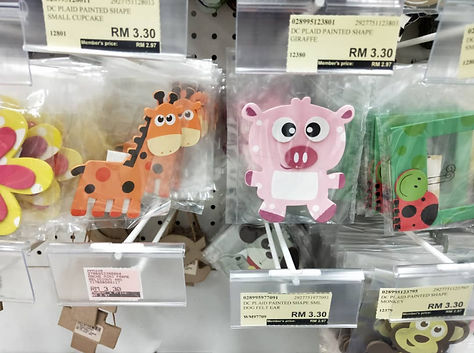
I had gone to art friend for some work for another class, that is when i also looked around for some remaining materials to replace the figurines for the snake and ladder game, because we originally wanted to 3D print, but our animal design was too complicated and small for it. That is when upon searching I stumbled upon these which looked cute enough for children to play with, and also would fit into our each square dimension.

(20 minutes)
David had done the separation of each plane already at home, so I helped listing down the colors on the piece of paper, and how many colors of each plane we needed. We then went to the 3D printing workshop and gave the file and paper to Mr Ahmed. He then showed us our previous ladders and numbers) for the snake and ladder) were already done printing.


(2 hours)
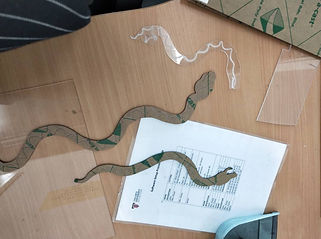
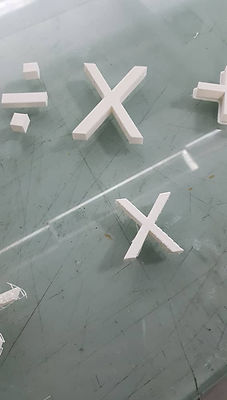
We decided to use acrylic for the snakes. So we gathered all the acrylic sheets we already had and decided to use that since we were already over budget. Tisya made the design in autocad and we came on 28th may to laser cut as the timing given to us by our lecturer. But when we went downstairs, there was no one there to help us and we sat there for a while and decided to call our friend Alifa from the science group to help us laser cut. But after she came we learned we have to save the file in different format, and our laptop was not responding, and while doing this we had to wait around an hour and half to just open the laptop.


While David was trying to fix the laptop, we had a quick meeting with Mr Ahmed from 3D printing. He showed us the planes that were already done, and then asked us to change some colors because he was out of that material, and then showed us that our multiplication sign was not 3D printing well for some reason, even though our files were completely okay. So we decided to try making new multiplication signs and give it to 3D print again. After all these we finally started our laser cut. It took around 30 minutes to laser cut the 3 different acylic sheets.

(10 minutes)
Next day we came to the workshop and handed in the new Multiplication signs file. And just the day before the final date to submit this project was given. So we requested Mr Ahmed to help us finish 3D printing by 11th so that we can work on assembling it on 12th with the help of Mr Fendi, and the submit it on 15th.

(15 minutes)
We went to Art friend again and finally decided on buying the 2-3mm thick mdf board for the backing because otherwise we would go over budget way too much if we bought the thicker ones. We then bought 4 cans of white spray paint as well to spray paint the back, as we have to make it look appealing to the children there, and also to match the science group's backing as they are doing a sticker background.


On Friday, we started spray painting all the MDF boards. And it took us 3 hours to spray paint 5 A1 size boards, because each needed 3 coats and it took time to dry as well. meanwhile we went downstairs to collect all the 3D printed items which were already done. We saw the new X file (multiplication file) printed better than the previous one even tho it was a little bit bigger, but it was still within our cube's dimensions, so it was okay.
(3 hours)
(4 hours)
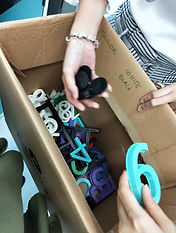
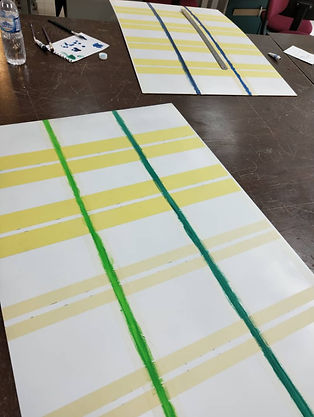
After the Raya break, we started to make the snake and ladder game. We prepared the 3D printed numbers, hand painted the grid lines and stuck the laser cut snakes on it. We had to do a few coats of the colorful grid line and had to use a sealant spray to stop the color from transferring or spreading. And used arcylic glue to stick the snakes in the board. We had to take the backing off the numbers to be recycled.

(5 hours)
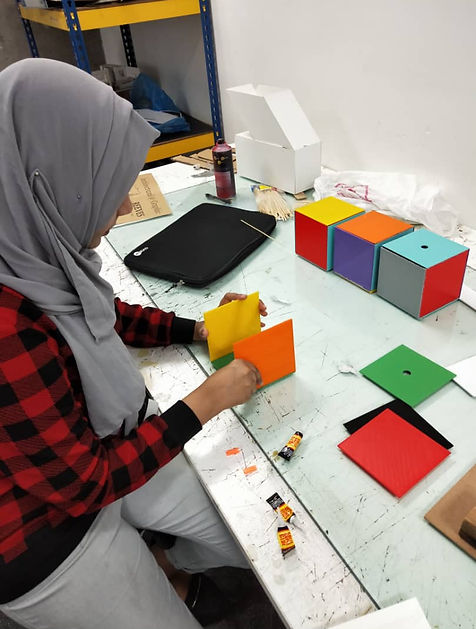
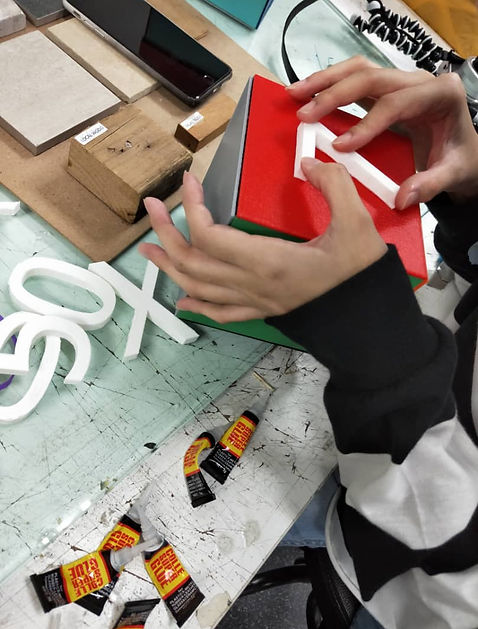
The next day we finished glueing the numbers to the snake and ladder board, and started preparing the 3D printed cubes for Mr fendi to help us assemble it the next day. Again we had to take the backing off the square planes, and that took most of our time since it was stuck to it, and took around 3 hours to just get 60 planes backing off. Then we all started making the cubes. And then glued the numbers to the cubes. We glued everything with superglue and left it to dry overnight.
(5.5 hours)
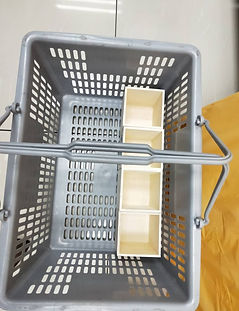
The next day, we all met up in campus at 10 A.M and finished the rest of the cubes as some were still being 3D printed. We then took all our cubes and went to the workshop to explain and show Mr fendi our idea and what we wanted to do. Then we had Mr Ahmed help us laser cut numbers and squares out of MDF for the answer part and also for the baskets. Then we returned back to the workshop, Mr fendi already had a sample up for us to see if it would work (is the cubes would spin properly and if the wooden stoppers would actually work as well). He then taught us how to make the holes in the cubes bigger, so that the dowels can enter it easily. After that he cut out 30 small squares of wood, in which we drilled holes, so that it can be used as a stopper to stop the cubes from sliding around. We then arranged the cubes as to how it would be assembled. Mr Fendi also kindly gave us an solid A0 plywood backing for the cubes backing to make it stable, he even made the stands out of wood from the workshop.


(6 hours)
The next day, we all started working on it again from 2:30 P.M. Before going to the workshop, I was helping the English group collect bottle caps for their learning aid, as they were still short of 80 bottle caps. So I went around our seniors and junior's studios asking if they had empty bottles or if they were willing to just give us their bottle's caps. we collected around 15 from that only. So then Alifa and I went around the whole campus and took bottle's caps from all the empty bottles we could find, we even went through trash cans to get bottle caps.After that I went to the wood workshop, and Hayze came to help Alifa with the bottle cap search.
At the workshop, everything was already done, we just had to screw in the cubes stand to the backing. So we double checked everything and screwed it in. Then as a thank you to Mr Ahmed and Mr Fendi for helping us so much, we bought them Starbucks.
After all these, we took everything back to our studio. Firstly we spray painted everything that we had laser cut the day before. Then we glued down all 30 stoppers into place with wood glue. Then we attached magnets behind each numbers for the maths answer part. I then helped the English group with some spray painting as well. We also prepared the basket/answer board.
But there was a problem,the dice that we had originaly 3D printed and glued together, it would break as soon as it would be tossed or thrown on the floor. So we had to find an alternative.


(1.5 hour)
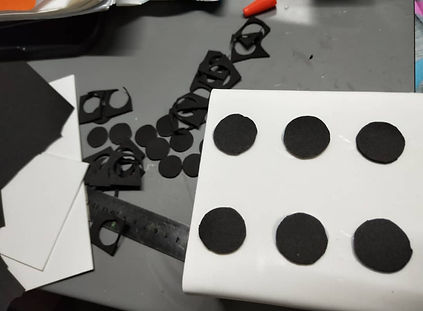
As mentioned earlier, the current dice was not working out, hence I made a completely new one out of Styrofoam and foam sheets. And the magnets in the answer part of the board was too small wand the numbers were falling off, so I went to campus and replaced it with magnetic tape instead.


(5 hours)
On the day of the installment, only a handful of people went for the installation process from group 5, hence we all helped each other in installing it, taking videos/pictures and etc. We first drilled holes in walls, then put in the plastic gripper, then drilled in the screw. We did not expect this would take this long to do, but since it was our first time doing it, it was a learning process.


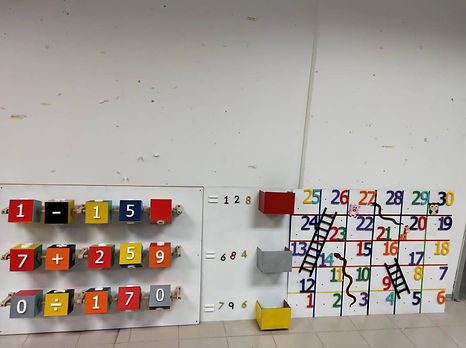
HOW TO USE THE MATHS LEARNING AID
REFLECTION
From planning to making and then finally installing, it was months long process and my group and I did face a lot of difficulties but we did get it up finally. It was an unique experience,making the math learning aid. We got the chance to use 3D printing for our design, which was really exciting because its a very rare opportunity. I'm very thankful for all my group members as well, because they all were very cooperative because of which our ideas came to life. And special thank you goes to Mr. Ahmed and MR. Fendi for helping us assemble the whole thing, because we actually would not have been able to assemble this by ourselves. Due to this project we gained more experience in wood workshop and the power machines, we learned how 3D printing works, and of course learned extreme budgeting. It was a different experience on site a s well. With every group busy with their own part, I saw the mini library come to life. I'm very thankful for having this opportunity to be a part of this journey and for being able to do something for the orang asli children. I hope it will actually be useful and educational for them. The game is fairly easy to play, the tutorial is given above, and I think the children will be able to play it, specially the snake and ladder game.